Back Up Your Device To A Mac
#1: Look For Updates.
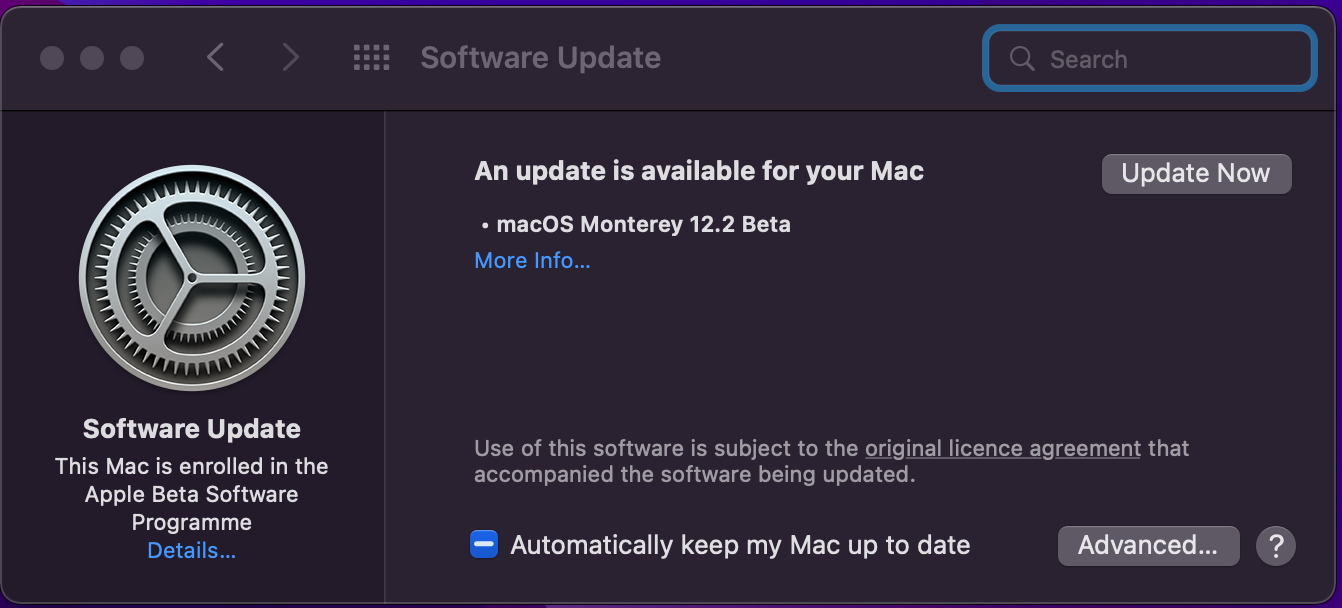
Time Machine is built into macOS and updates to the OS may include fixes for problems in Time Machine.
Open System Preferences > Software Updates and check.
in this tutorial i'll reveal some Hidden tips, tricks, and shortcuts.
As Mac users, Apple's Safari internet browser is a staple of our every day lives.

if you wish to remove information on the site you have visited in the standard (non-private) mode, go to history>Clear History. When you do this all stored info on the site you have visited will be erased.

Go to Safari > Preferences > Password to view all of the internet sites that store passwords and their respective user names. Click on one to display the password.

Safari's hidden 'Develop' menu is essential for web developers as it allows you to test out all aspects of a page before making it live. However, this menu also provides options that more casual Safari users can enjoy. To access this menu, go to Safari > Preferences>Advance and then tick the 'Show Develop menu in menu bar' option.

Go to Bookmarks > Edit Bookmarks(or press alt+cmd+B)and you will be taken to a screen displaying all of your bookmarks. Here you can organise them exactly how you want.
Ensure you have a valid iCloud setup and go to System Preferences > General and enable 'All Handoff between this Mac and your iCloud devices'.
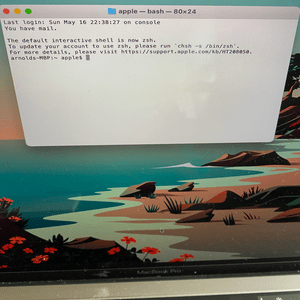
Found in Application > Utilities, Terminal features a command line interface that allows you to take control of your Mac's operating system. Some commands require password authentication to input, so it's thankfully hard to break your system by accident.
Ensure the files on your iOS devices are available on your Mac and keep important data safe by syncing and backing up. There was a time when everyone would plug their iPhone or iPad into their computer and use iTunes to sync data and or make a back up. This practice largely went out of fashion once iCloud become the go to method of keeping information safe. But that's not to say you shouldn't continue to use your Mac in such a way. Indeed, even though Apple dropped iTunes from 10.15 Catalina onwards, it retained the ability to sync and back up with the Mac, it just moved the feature to finder. Here i will take a look at how it all works and explore two methods: one requires you to connect your device with a wire and the other allows you to use Wi-Fi.
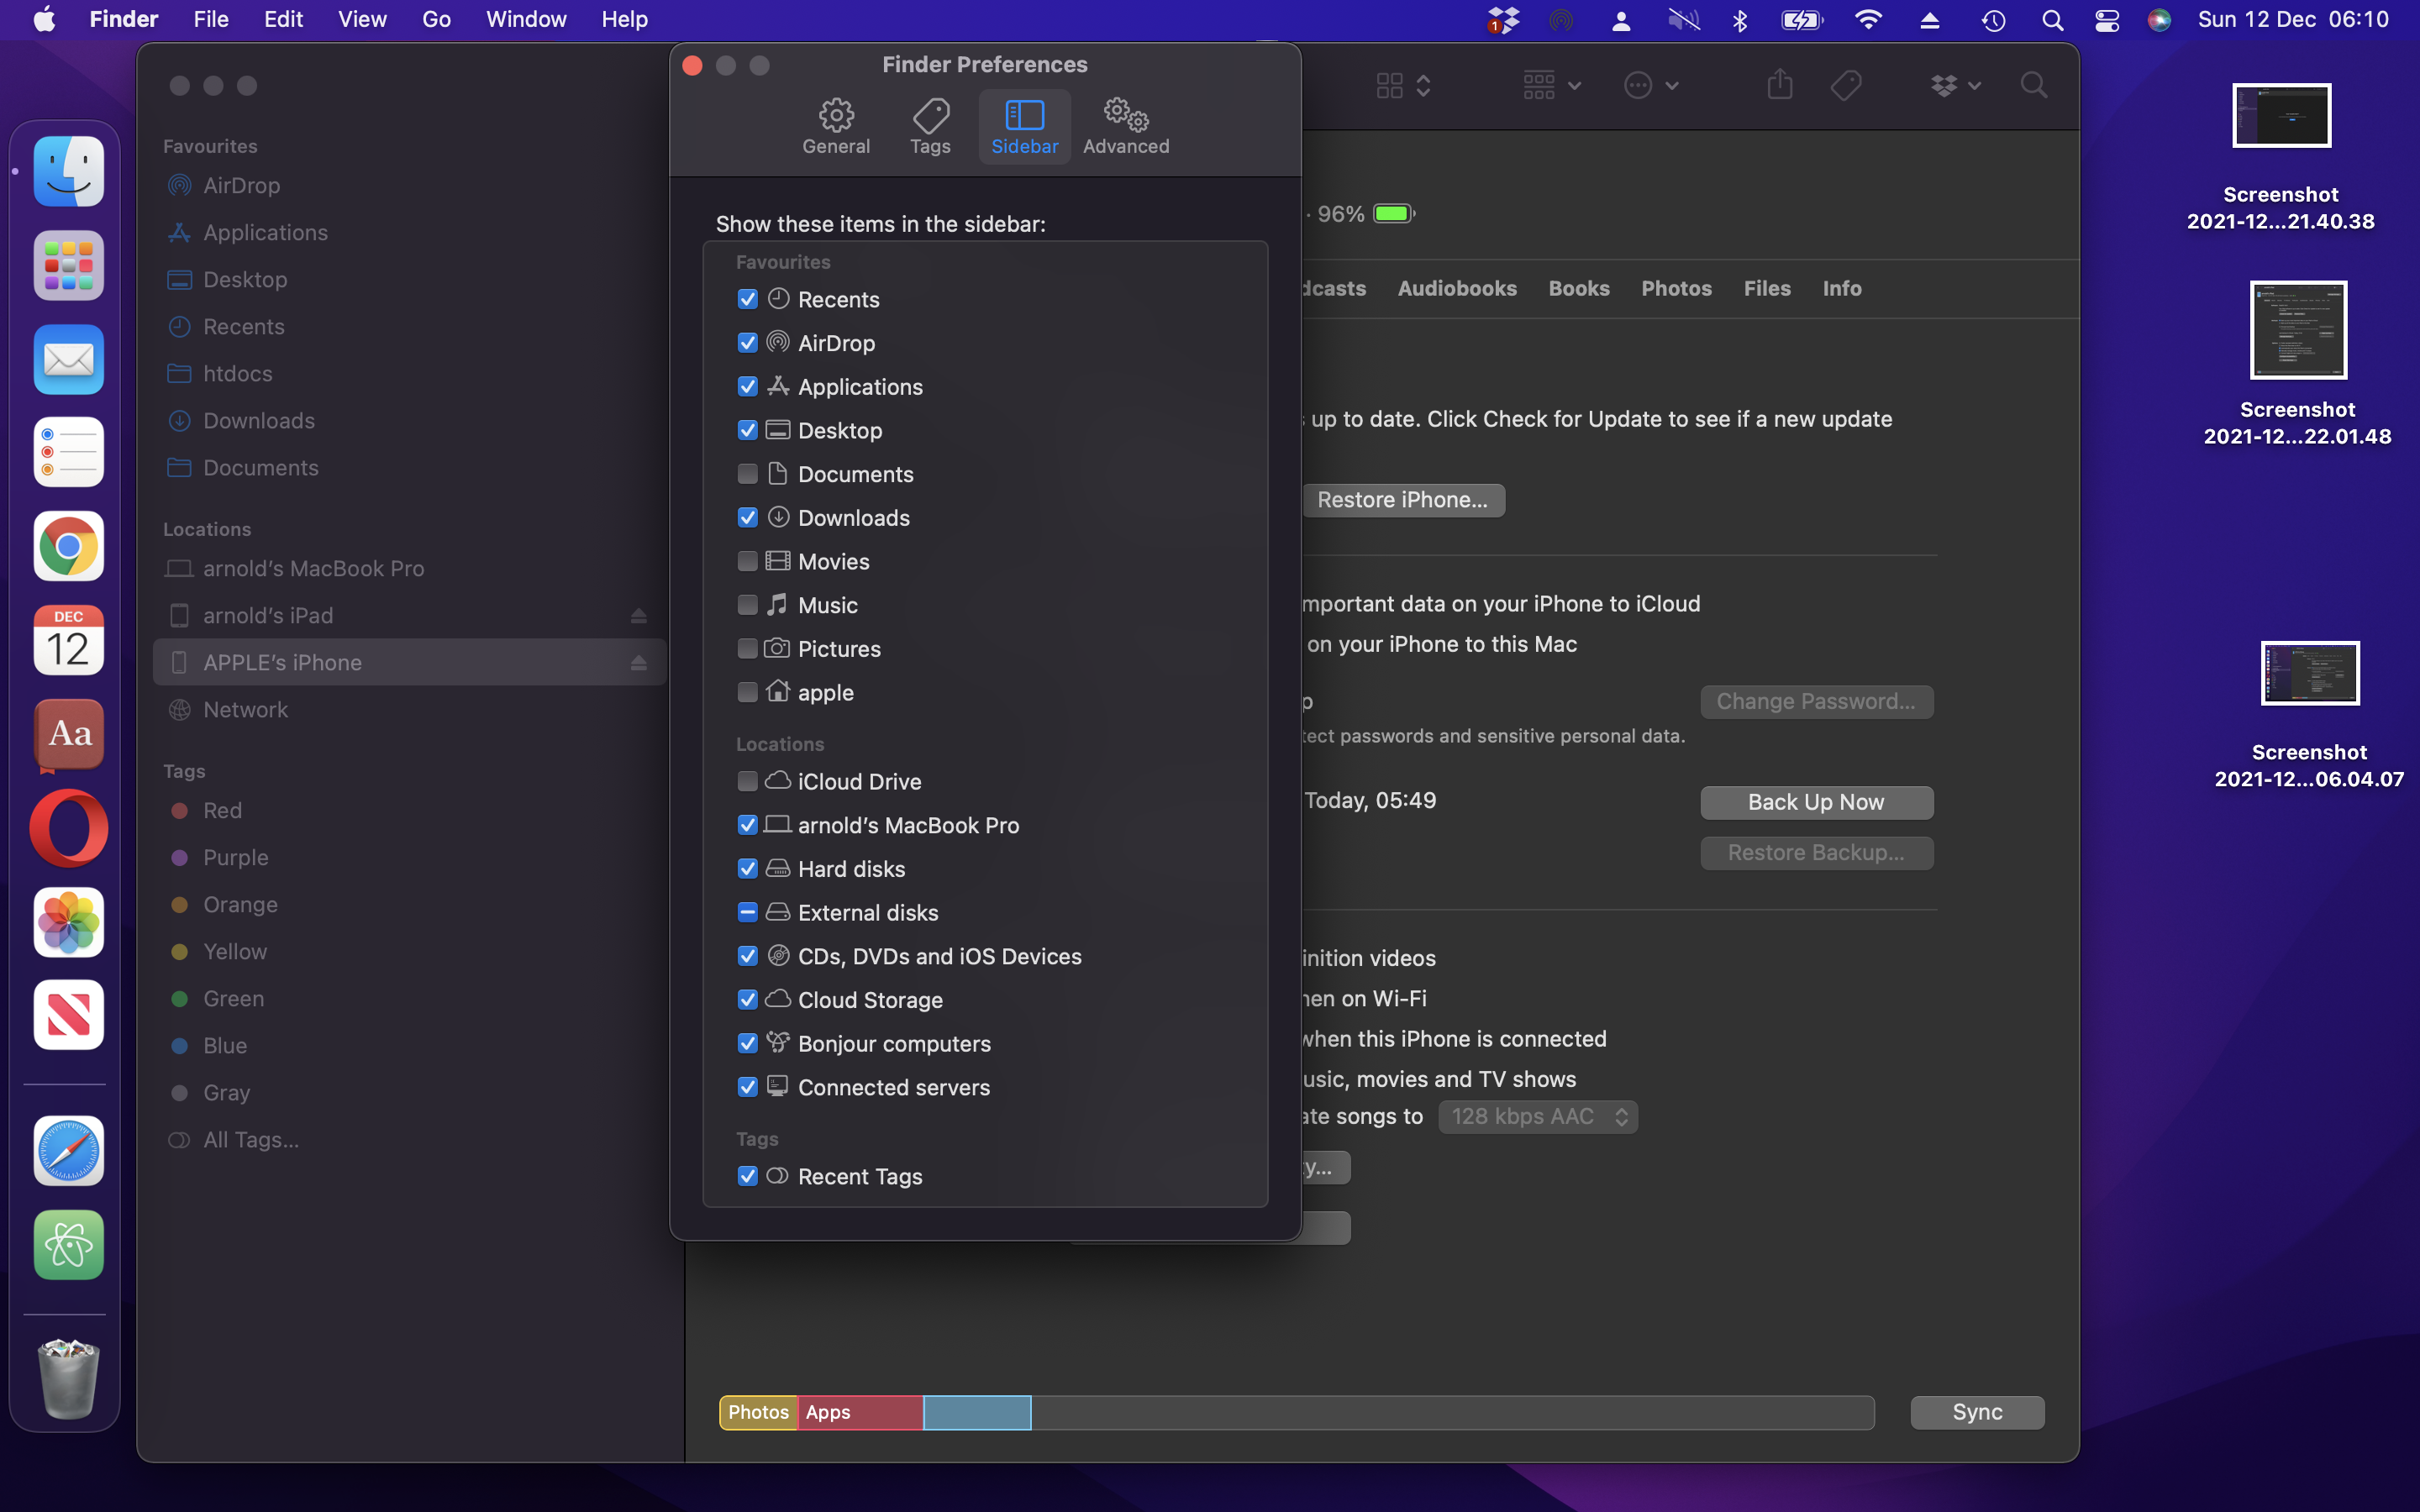
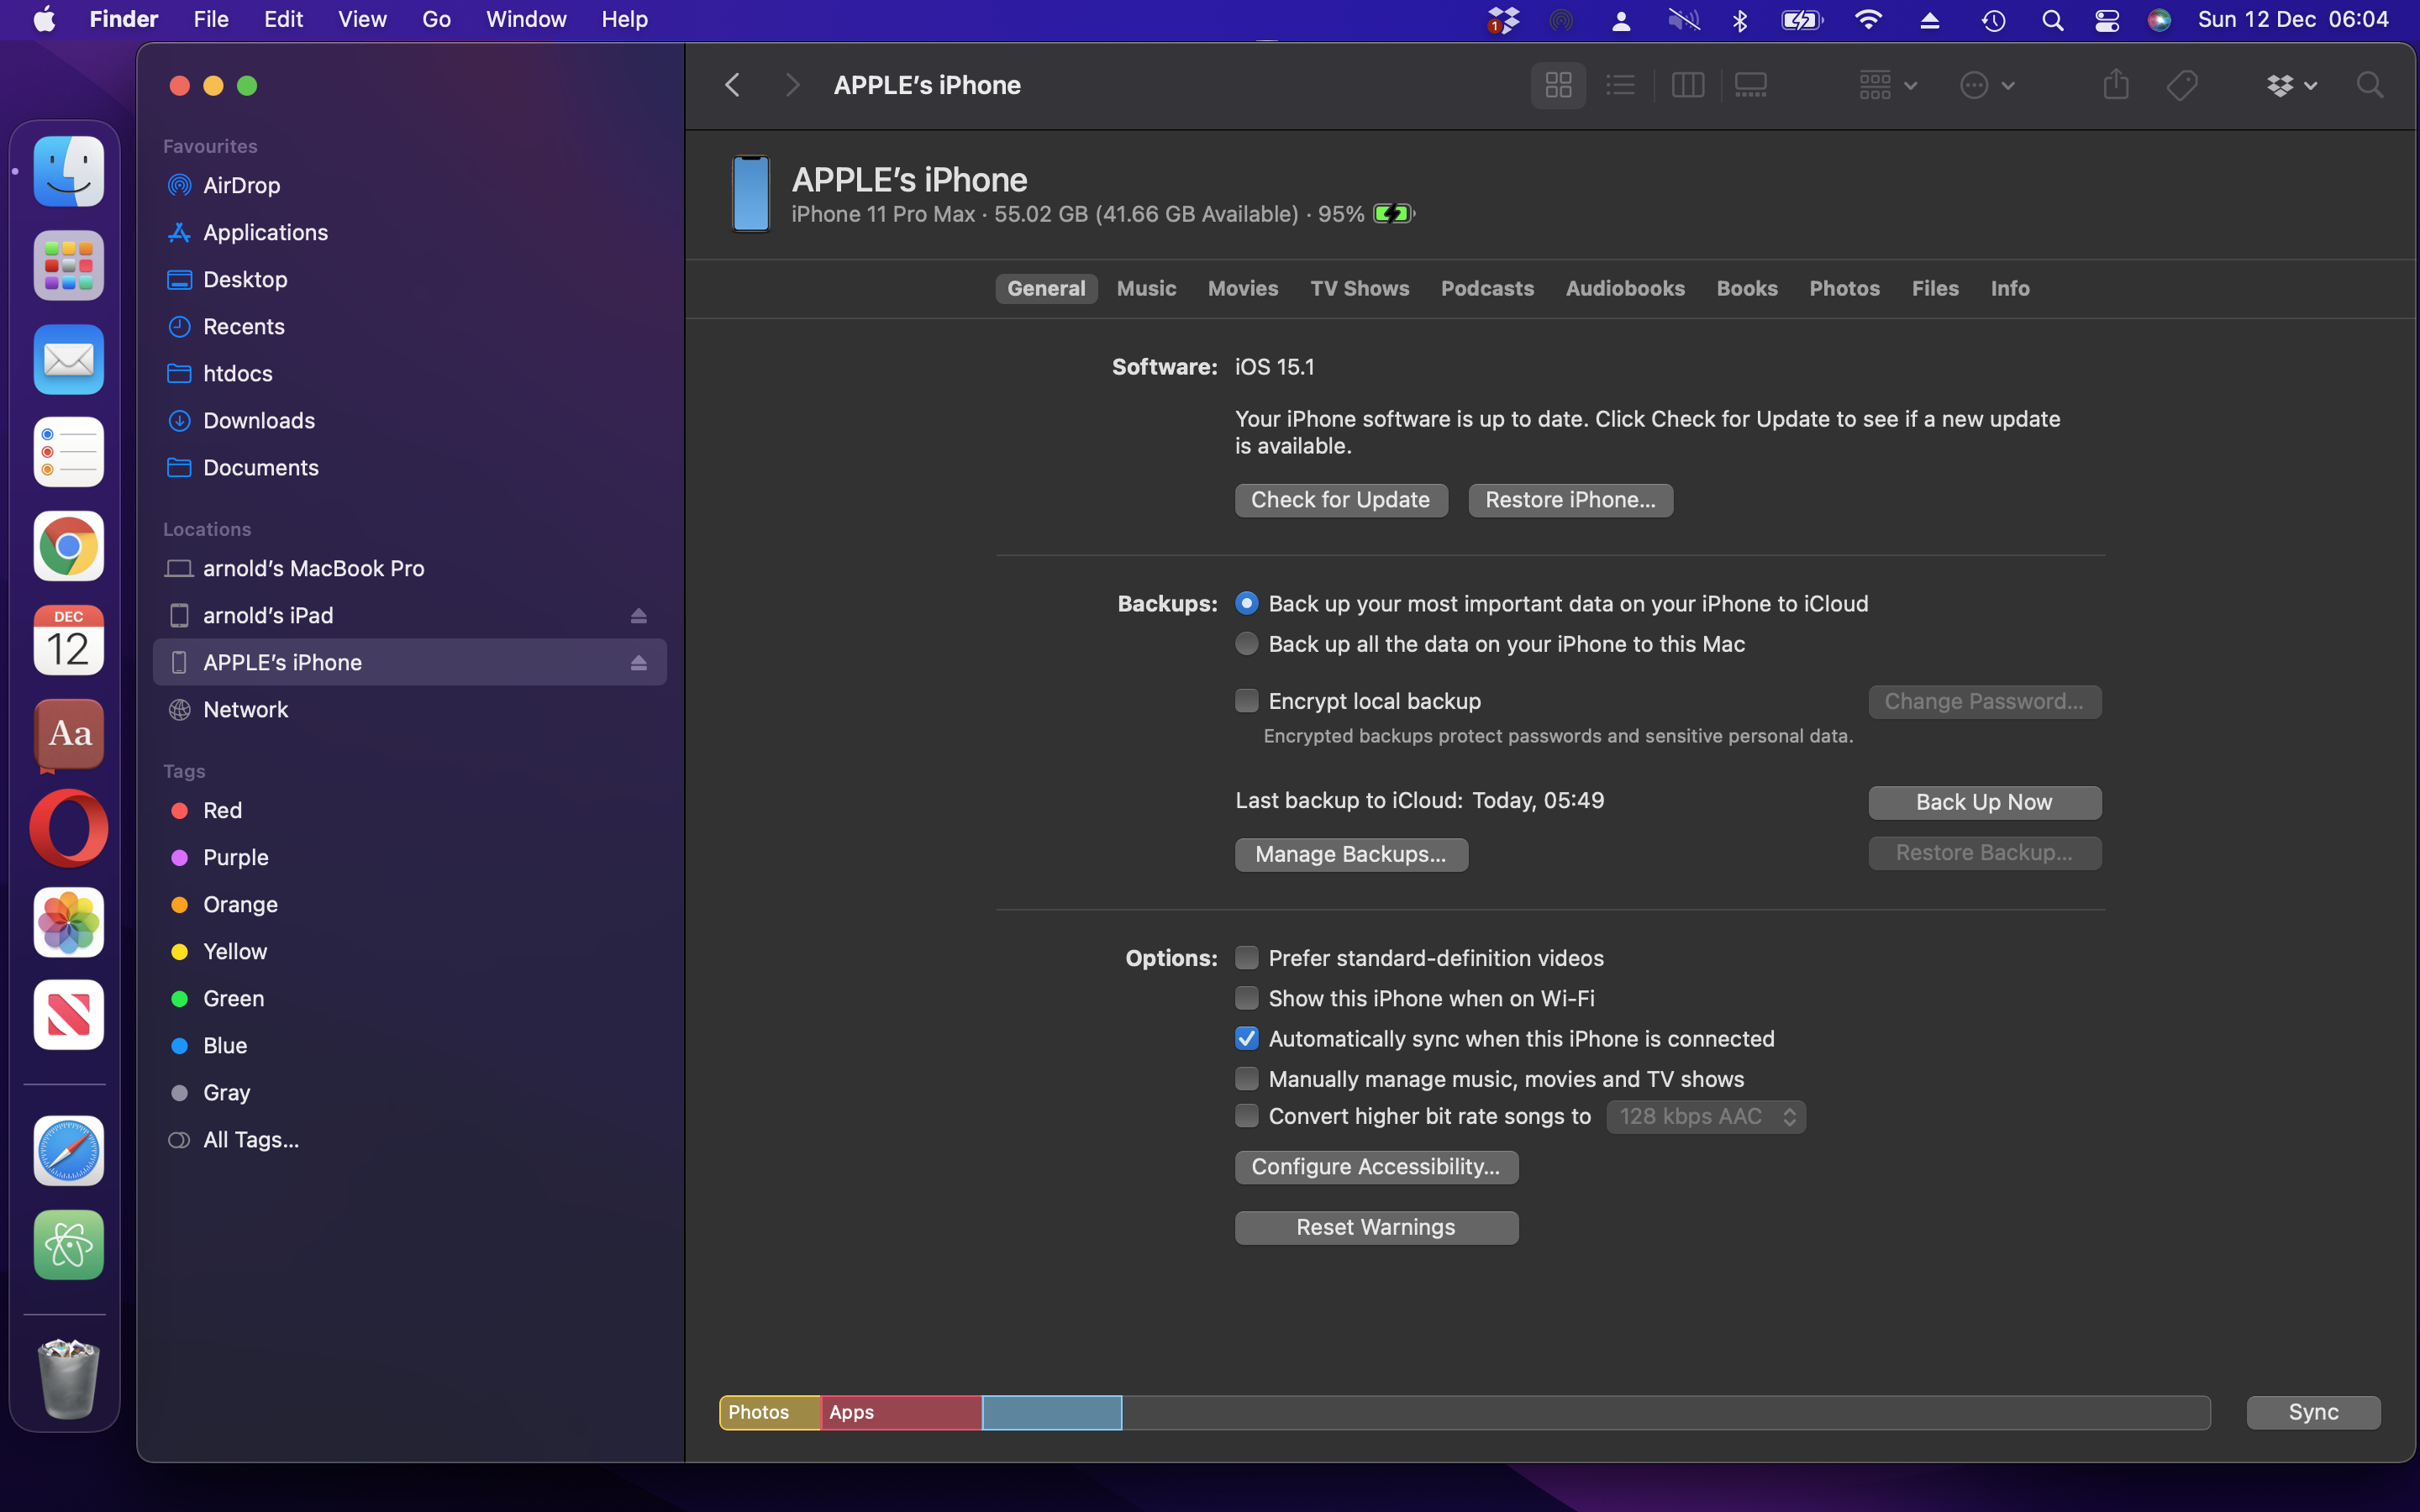
Use a USB or USB-C cable to physically connect your iPhone or iPad to your Mac. Launch Finder and you should see the name of your device listed in the left-hand sidebar.
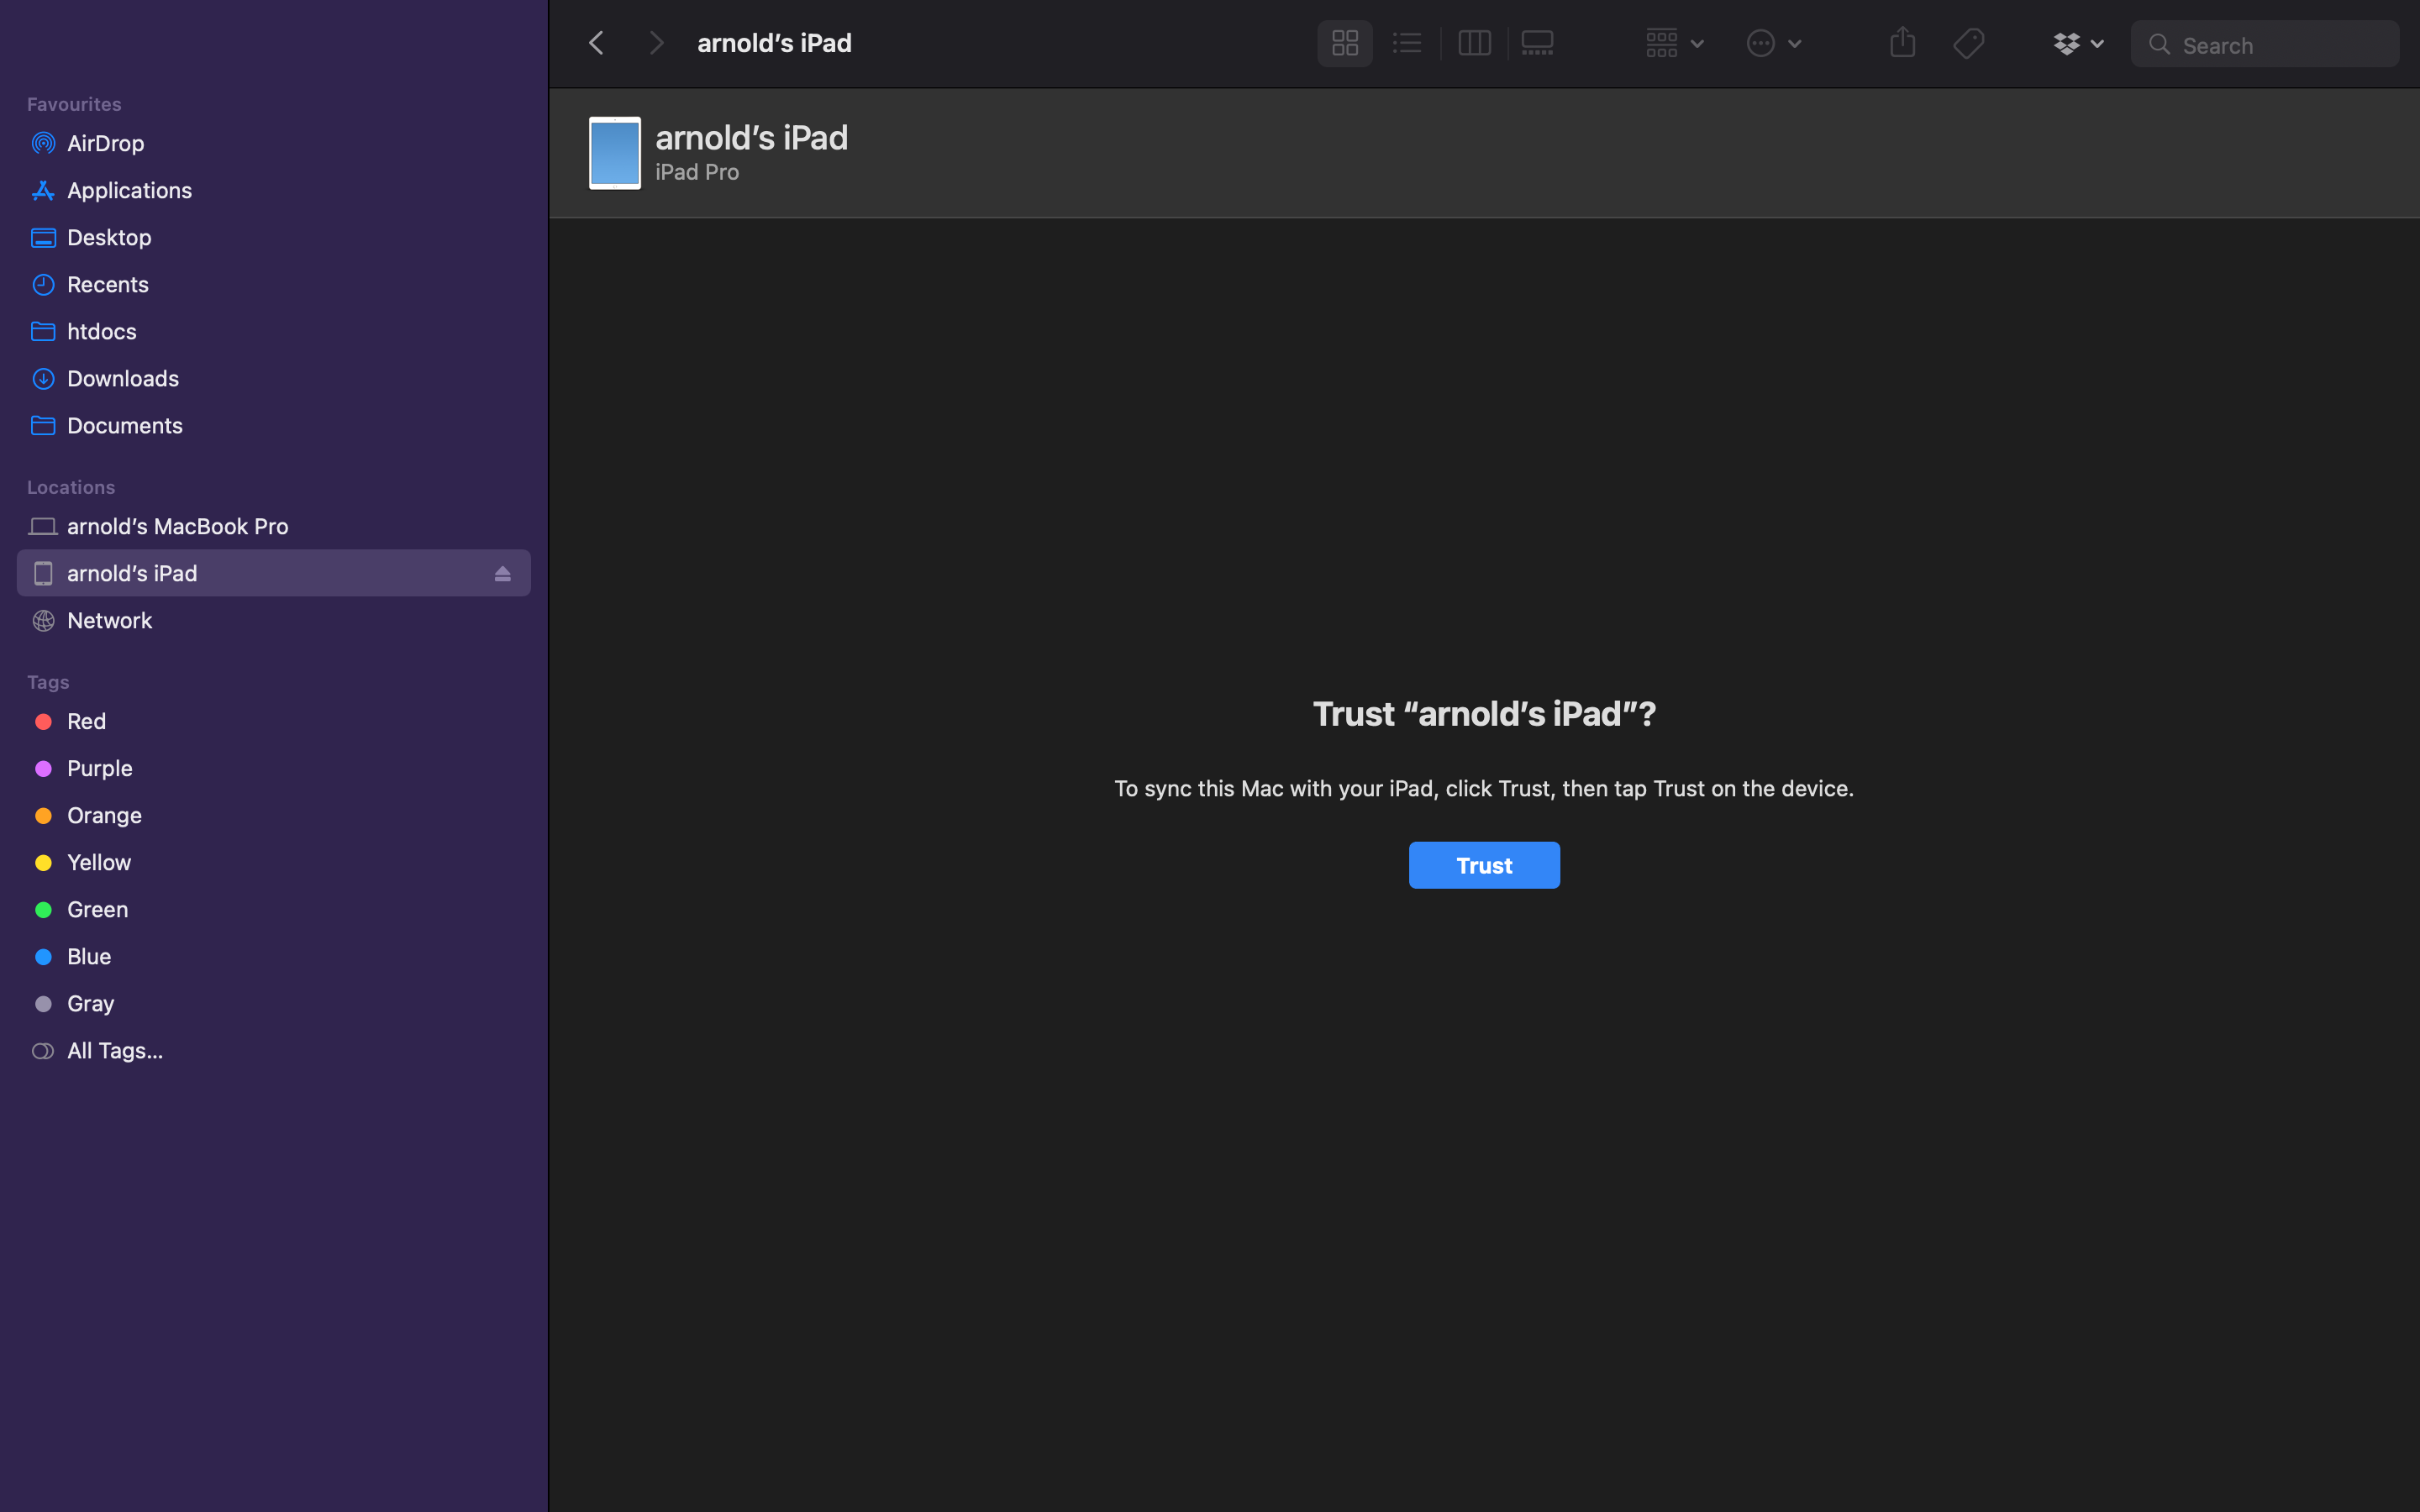
You'll be asked to confirm you want to connect this particular iPhone or iPad. Click 'Trust' then grab the device and tap 'Trust' on those too. Enter your passcode to confirm.
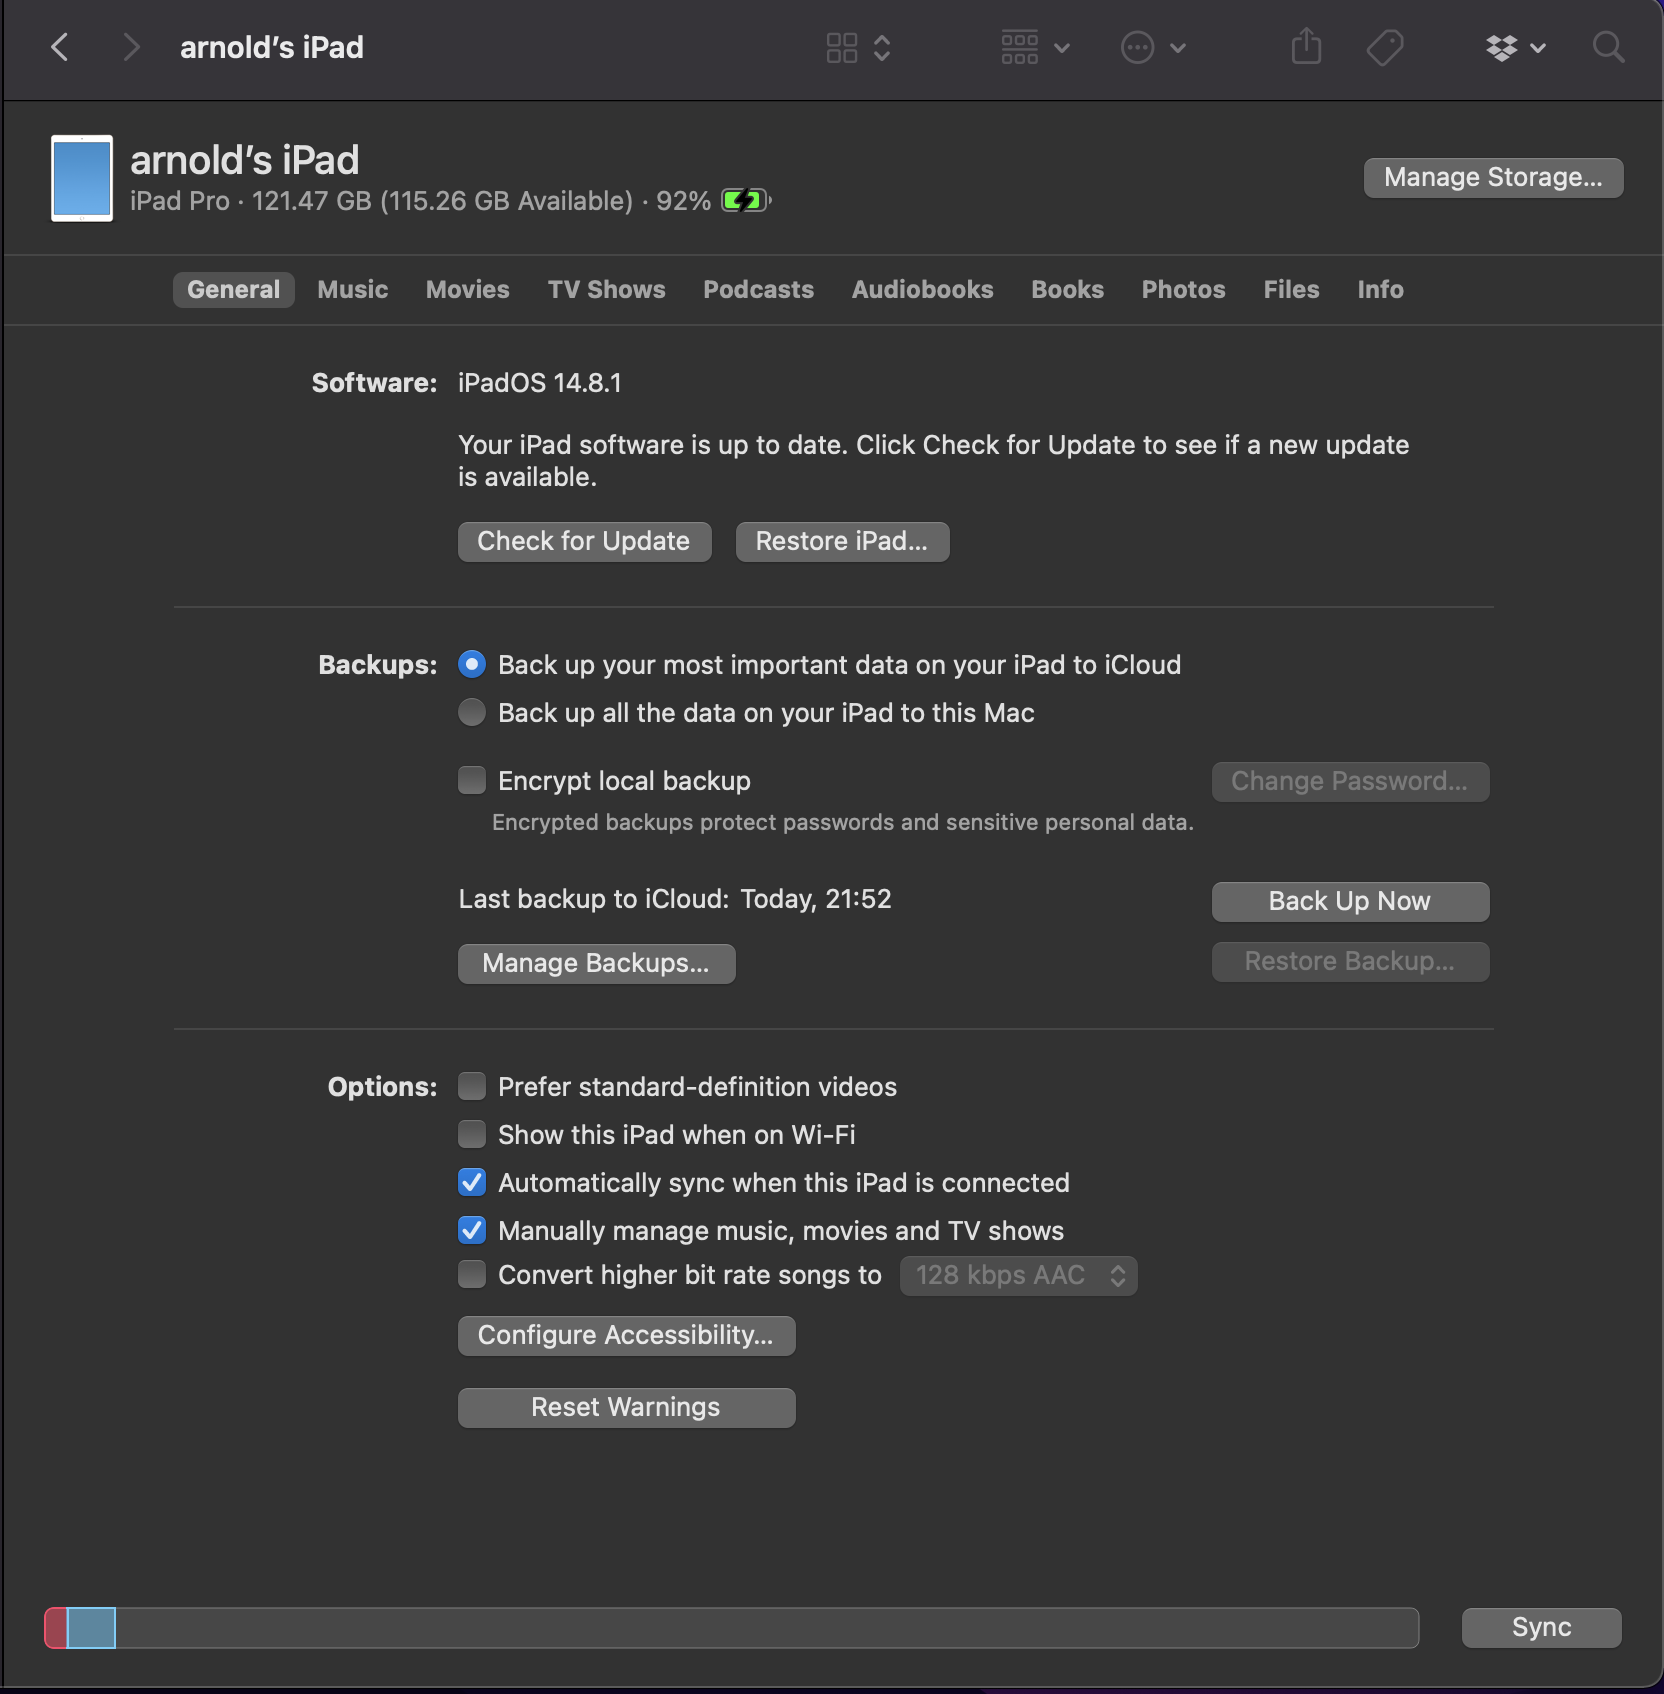
Close to the top of the Finder Window, beneath the info about your device, you'll see a bar containing the types of content you can sync. Select one, for example, 'Music'.
if you want to sync the music on your device to your Mac, you should tick 'Sync Music onto iPhone'. Note that you don't have to sync the whole library.
For TV Shows, you can decide if you only want to sync unwatched programmes or the newest content. You can also select specific content you don't want to sync.
Keep an eye on the bar at the bottom of the window - it indicates how much space you have left on your device. If you're happy with your syncing options, select 'Apply'.
#1: Look For Updates.
Time Machine is built into macOS and updates to the OS may include fixes for problems in Time Machine.
Open System Preferences > Software Updates and check.
#2: Plug It In.
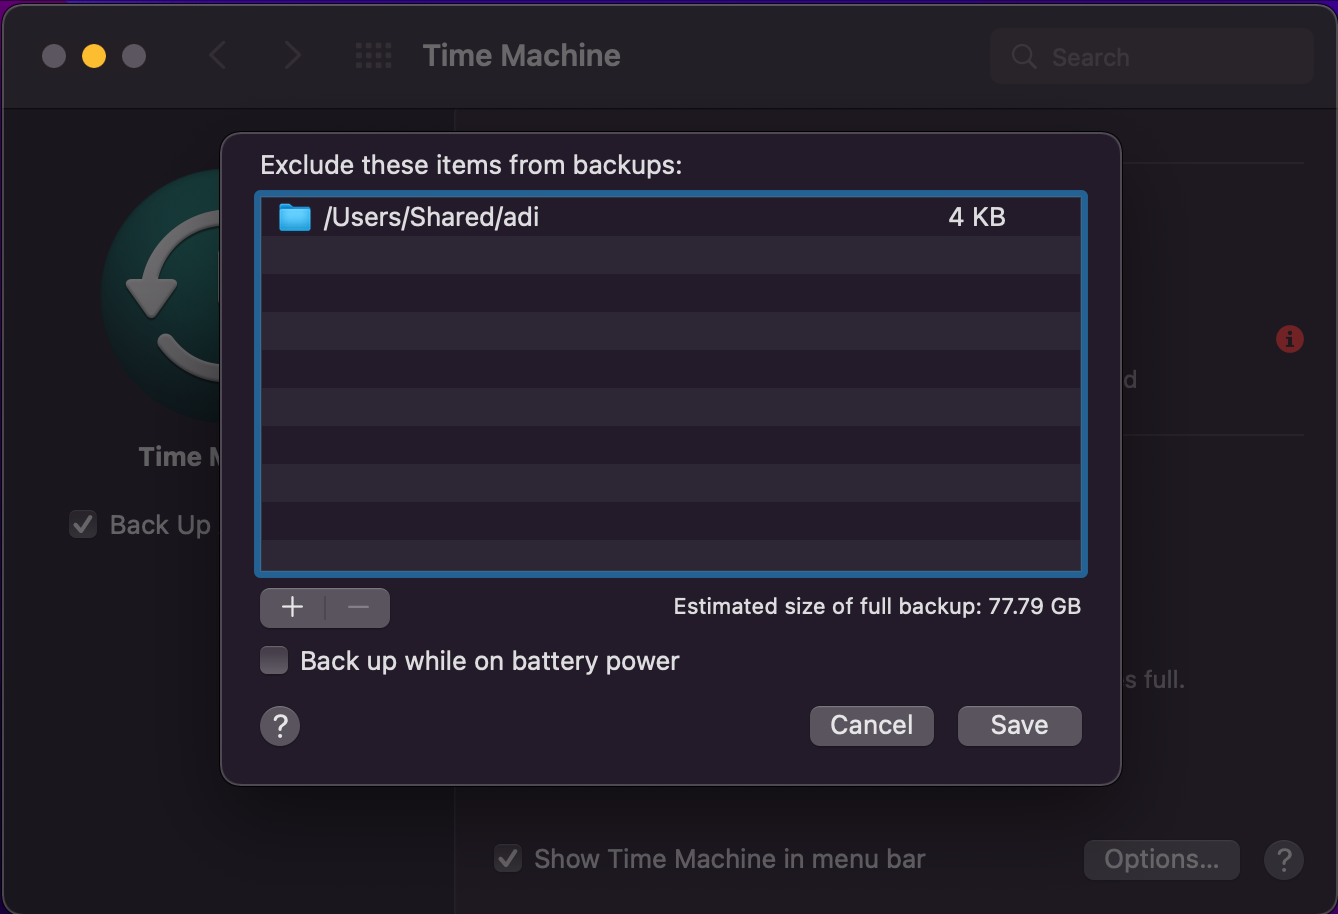
if Time Machine is not backing up, it could be because your MacBook is on battery power.
Go to System Preferences > Time Machine > Options.
#3: Back Up Everything.
Backups are great when you want to transfer information to a new device or if you lose an iPhone or iPad.
To create one, just click on the 'Backup up all the data on your iPhone to this Mac' option.
#4: No Space Left.
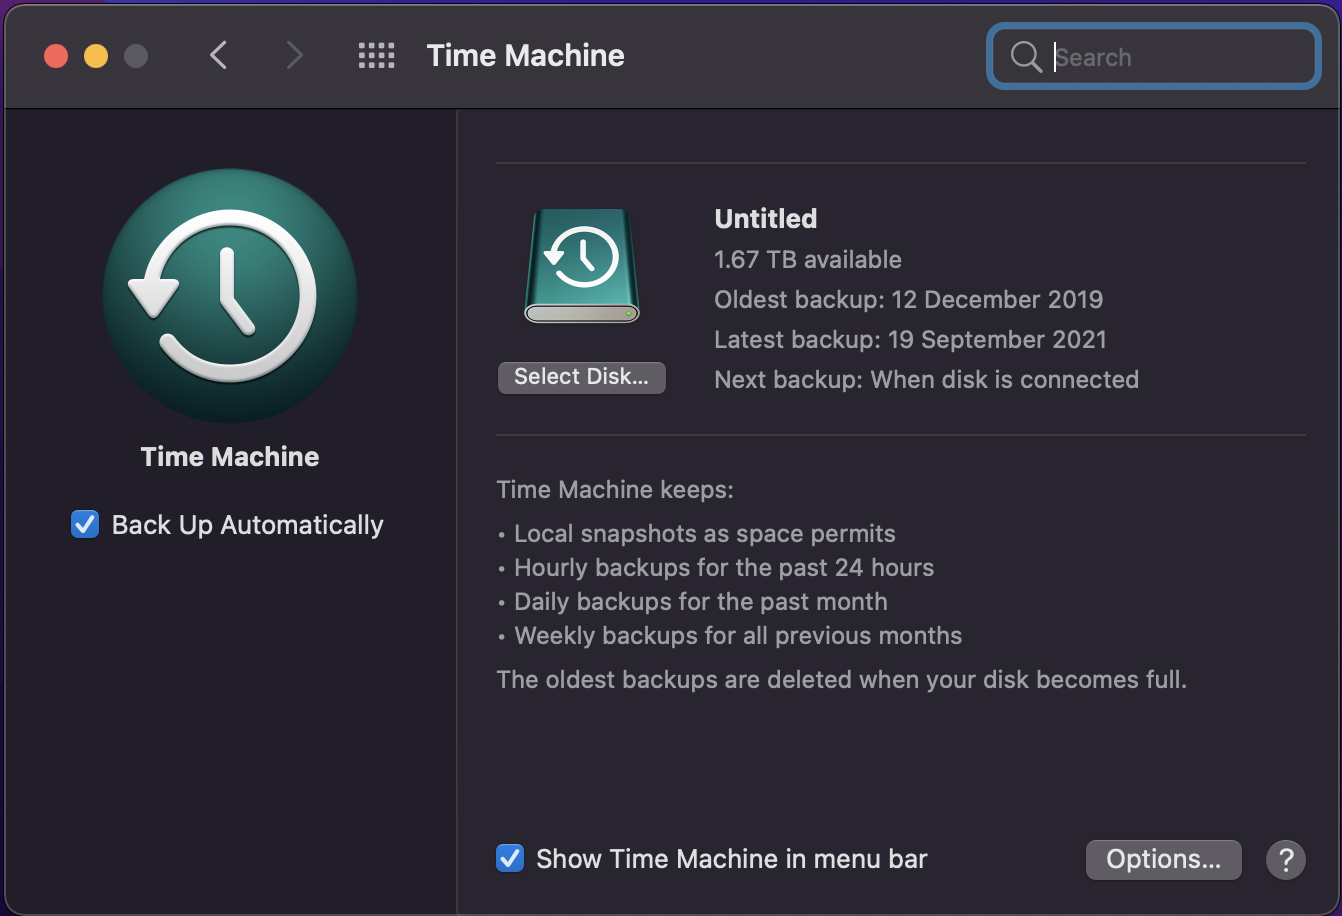
if the Time Machine disk is not big enough, a significant amount of time is spent freeing up space by deleting old backups.
If this often happens, get a bigger USB disk.
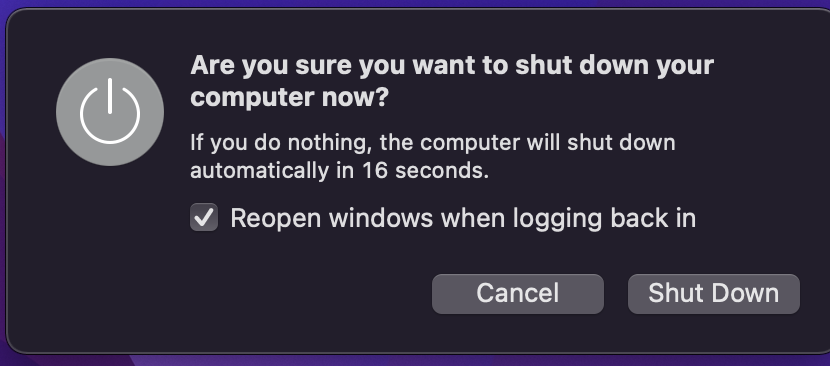
if Time Machine is not working, power of the Mac and all external devices.
Then power on the Mac with the USB drive directly connected to the Mac, not using a USB hub.
.
.
Most USB drives can be used with Time Machine on a mac, but unless they are specifically design for Time Machine,
they may need partitioning and formatting in order to make them Compatible.
This is especially true if you are repurposing a drive that has been used with other computers,
such as windows PC. Whether new or old, you need to format the disk. But don't worry, just follow the guide to learn how to do this.
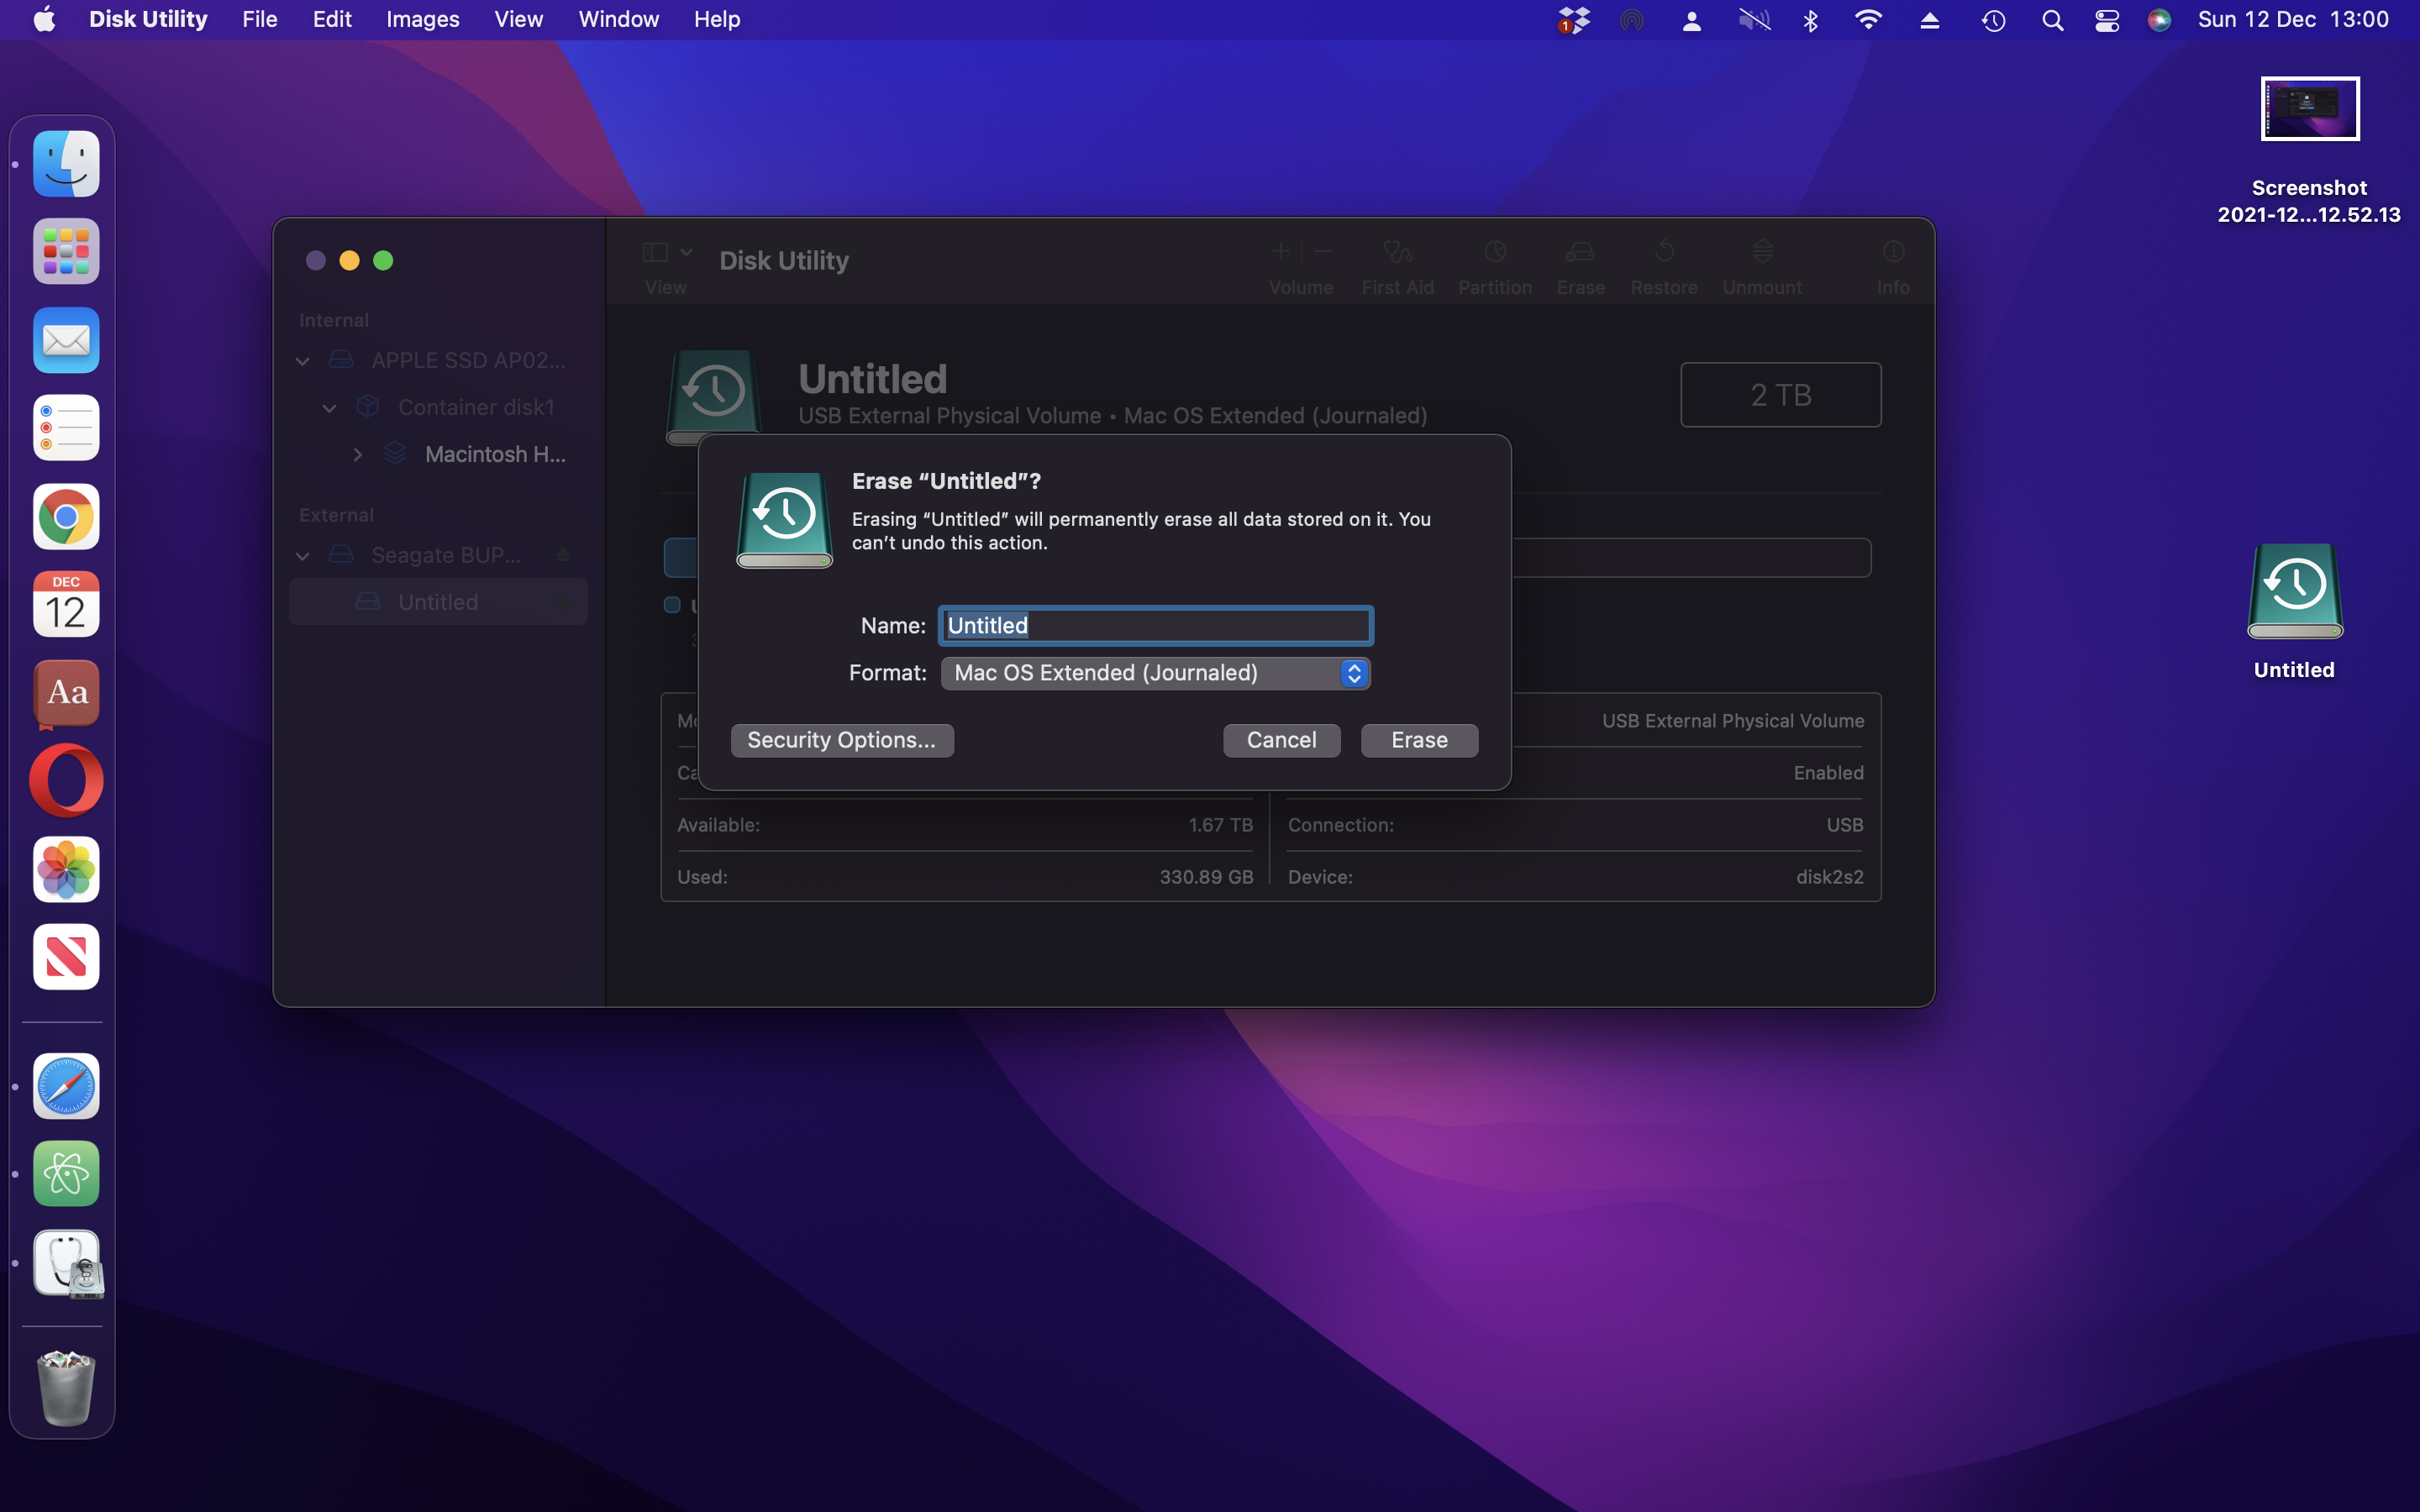
A: Prepare The Drive.
Before using a drive for the first time, format it, Open Disk Utility in the Utility folder.
Select the drive or partition on the left and then click 'Erase'.
Mac OS Extended will work, but APSF is best.
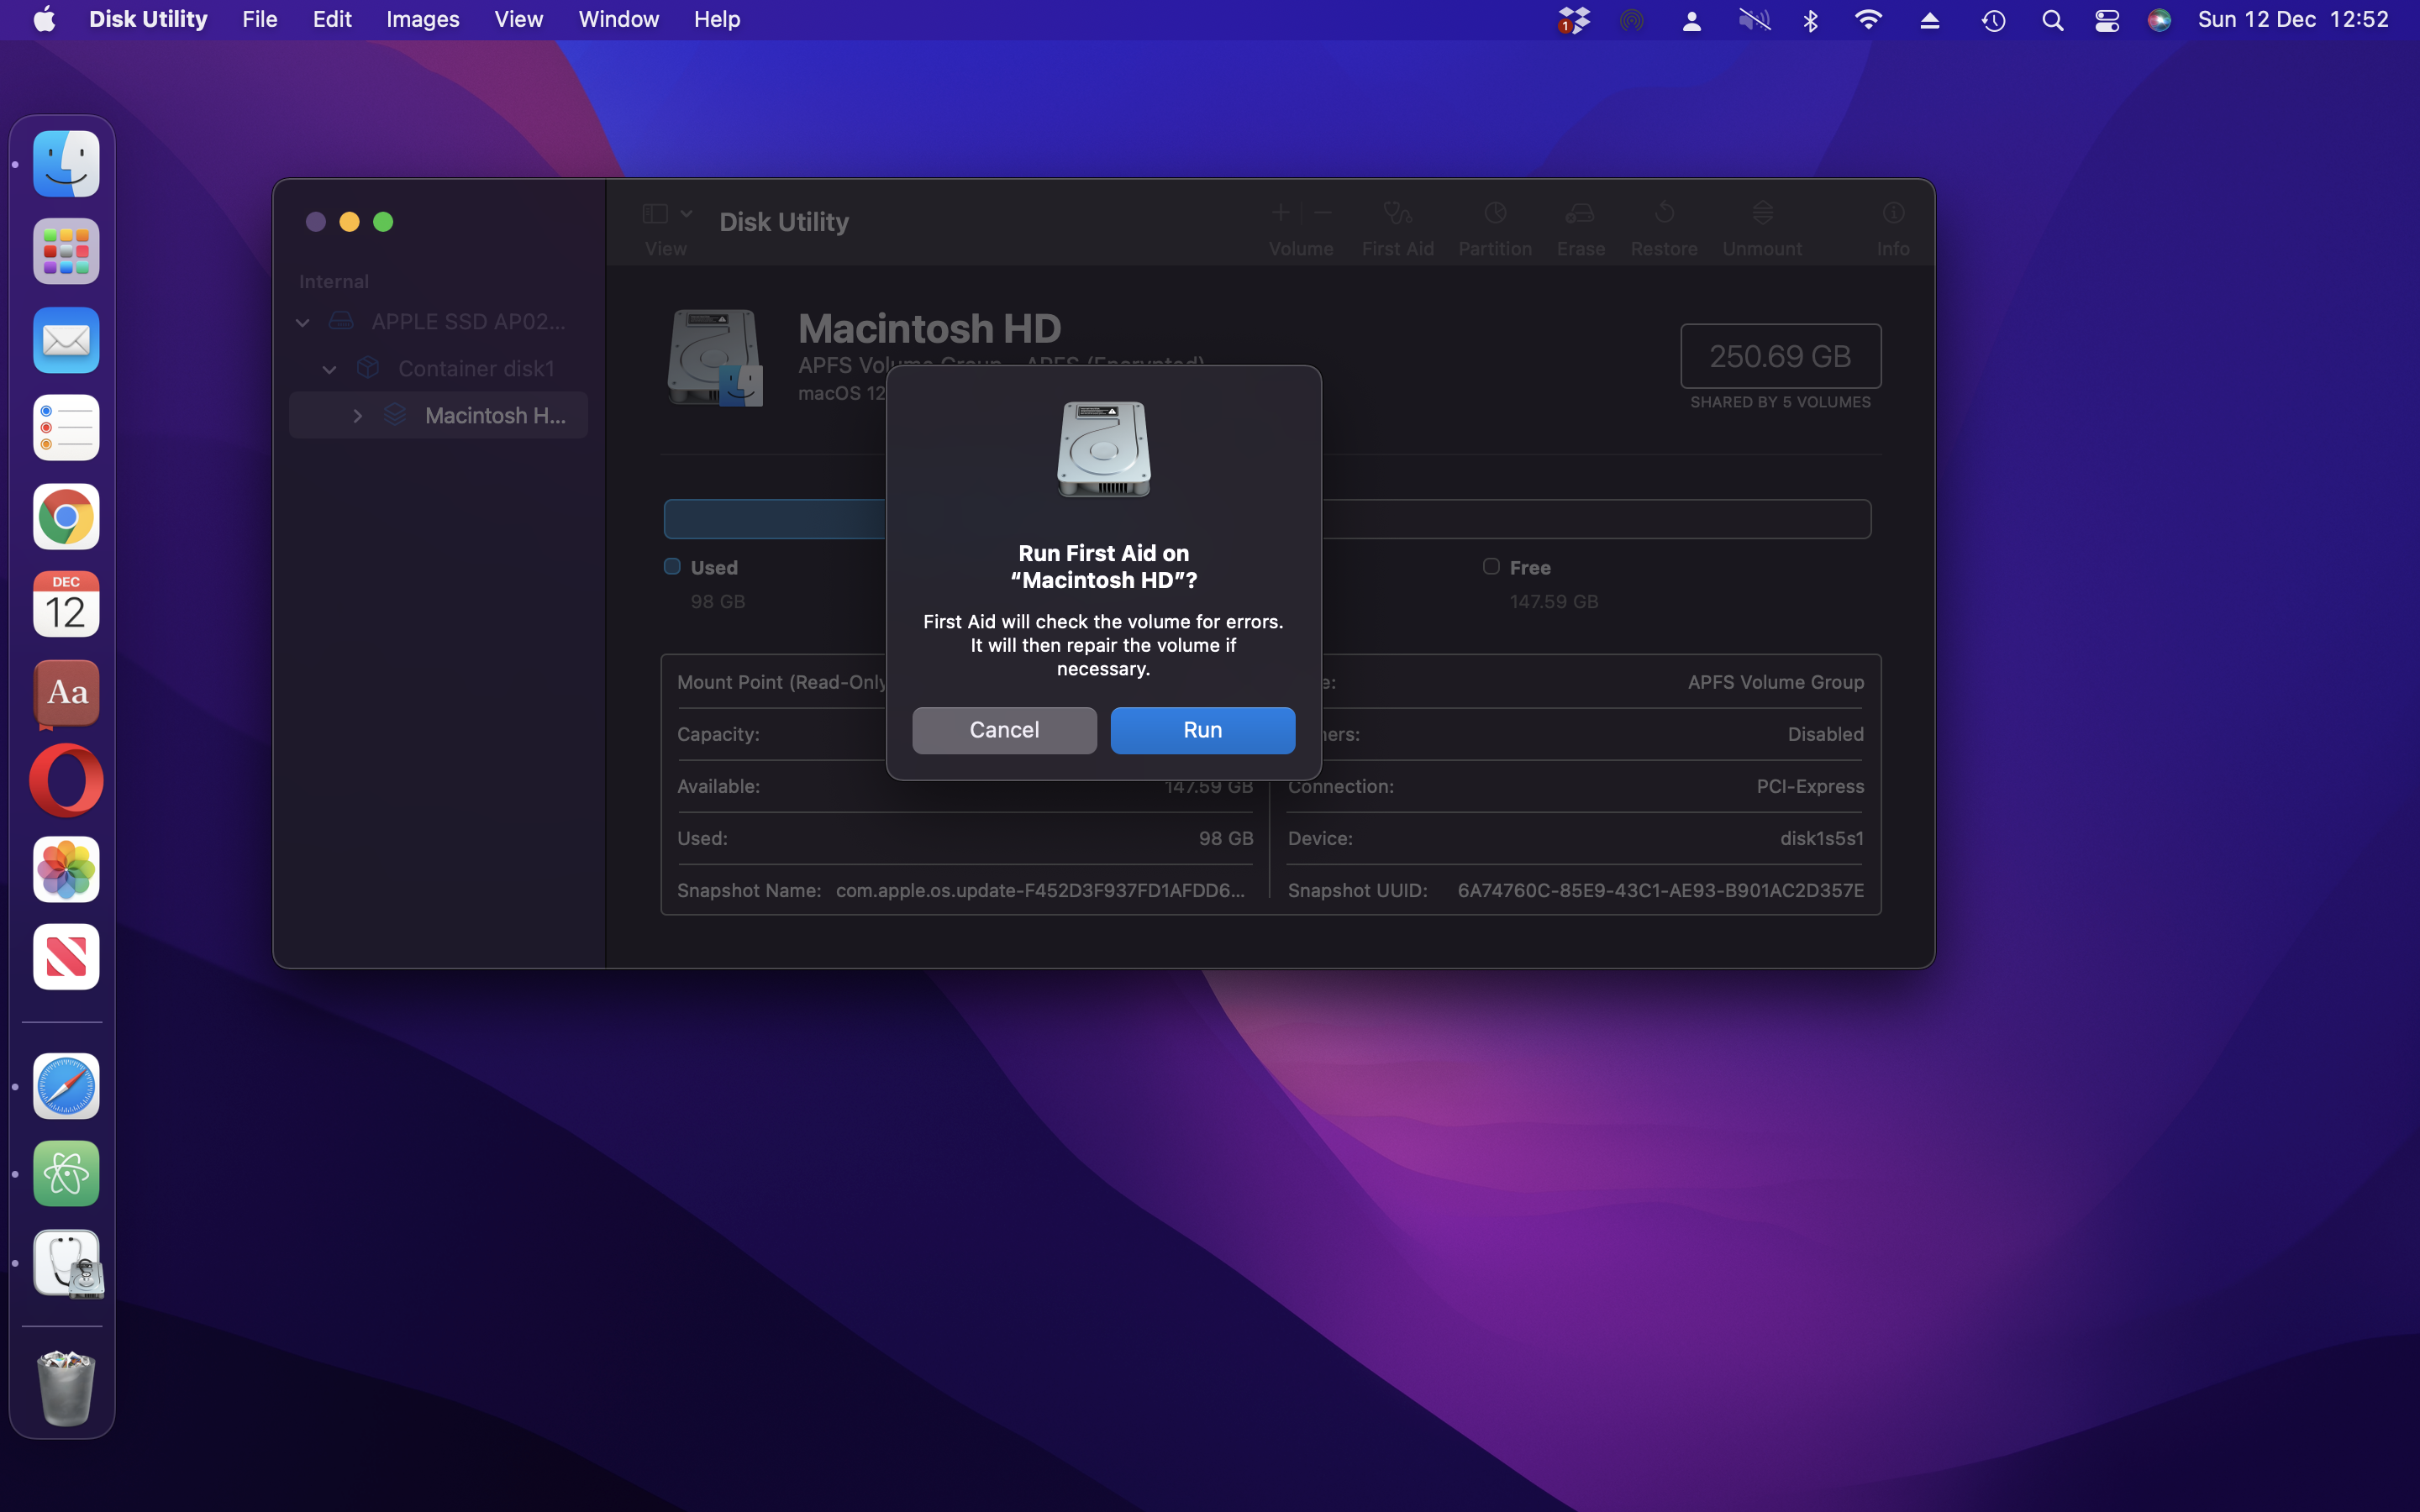
B: Run First Aid.
An external USB hard disk drive may develop file system errors that causes problems for Time Machine.
Select the drive or partition on the left in Disk Utility and then click the 'First Aid' button. Click 'Run'.
The best ways to speed up your productivity and reclaim minutes, if not hours, every day.
Who could forget this feature? Well, a lot actually, because its purpose in every day life doesn't extend much further than troubleshooting problems for less tech-savvy people. while in a Message conversation, click on the 'i' icon in the top corner and then click on the 'Share' icon that shows two screen.
You can drag and drop a URL from safari into your Dock(to the right where your open and recently-used apps reside), meaning that you can simultaneously launch Safari and jump straight to that site. It's easier if you drag it from Bookmarks in the sidebar.
AirDrop is a fast and highly efficient means of transferring files between apple Apple devices. To shift files from your Mac to your other devices, make sure they're all on the same Wi-Fi network then, in finder, click Go > Air-Drop and then drag the file to the desired device that is displayed within the Air-Drop Finder Window.
Rather than fiddling around in System Preferences, you can prevent your Mac from sleeping when idle by opening the Terminal app and typing (caffeinate). As long as the Terminal Window is open, your Mac will remain active. Press ctrl+C or quit Terminal to disable the function.
if you are using MacOS Monterey, head to System Preferences > Apple ID > iCloud and then click on the 'Option' button next to 'Hide my Email'. All of the apps and services that require an email login will be listed and you can opt to hide your real email address and replace it with a random one (and get emails forwarded).
if you like to type head-down then it is possible to have your Mac speak what you type to help you avoid mistakes. Go to System Preferences > Accessibility > Spoken Content and tick the 'Speak typing feedback' Option. You can click the 'Option' button next to it to determine exactly what is spoke back to you, such as characters and words.
Hovering on the green circle in the top-left corner of a file or window brings up options to view it in full-screen or tile the file to the left or right of the desktop. However, if you hold the 'option' key while hovering you will see the classic 'Zoom' option to Maximise/Minimise the window or file.
By default, when you take a screenshot on your Mac it will be saved to the desktop, but you can change this. Open the screenshot app (or press cmd+shift+5), click 'Options' and then, in the 'Save to' section at the top of the menu, choose 'Other Location' and navigate to the folder you wish to use.
As you will no doubt be aware, when using the spotlight search on your Mac, you can drag the floating field and reposition it anywhere on your desktop. However, if you wish to reset the search field to its original position at the top of the screen, simply long-click on the Spotlight icon in the menu bar.